Don't you love it when you write up your post, think you've posted it, then check 6 days later, and realize that you only saved it, but didn't post it?!
Here is the Tutorial I
posted saved last week for you. Enjoy!
I needed two bags, so this tutorial is for two, but can easily be adapted for fewer or more, as needed.
Materials Needed:
2 T-shirt, different colors (the size of the shirt will determine the size of the bag.
2 yards 5/8” grosgrain ribbon (you need 1 yard for each bag)
4 Eye holes/Grommets
Coordinating sewing machine thread
Contrasting Embroidery Floss
Freezer Paper
Tailor’s chalk/pen/pencil
Scissors
Hammer
Iron
Other tools (helpful, but not necessary):
Rotary Cutter
Clear Ruler
Cutting Mat
Yard Stick
Safety Pin*
1. Cut off the top of the t-shirts, just under the arm holes. I just have a 12 inch clear ruler and a 15 inch cutting mat, so I lined my yardstick up, armpit to armpit, and drew a line. Then, I used my rotary cutter to quickly cut through both layers of the t-shirt. And, look! The sides are done! Now for the top and bottom…
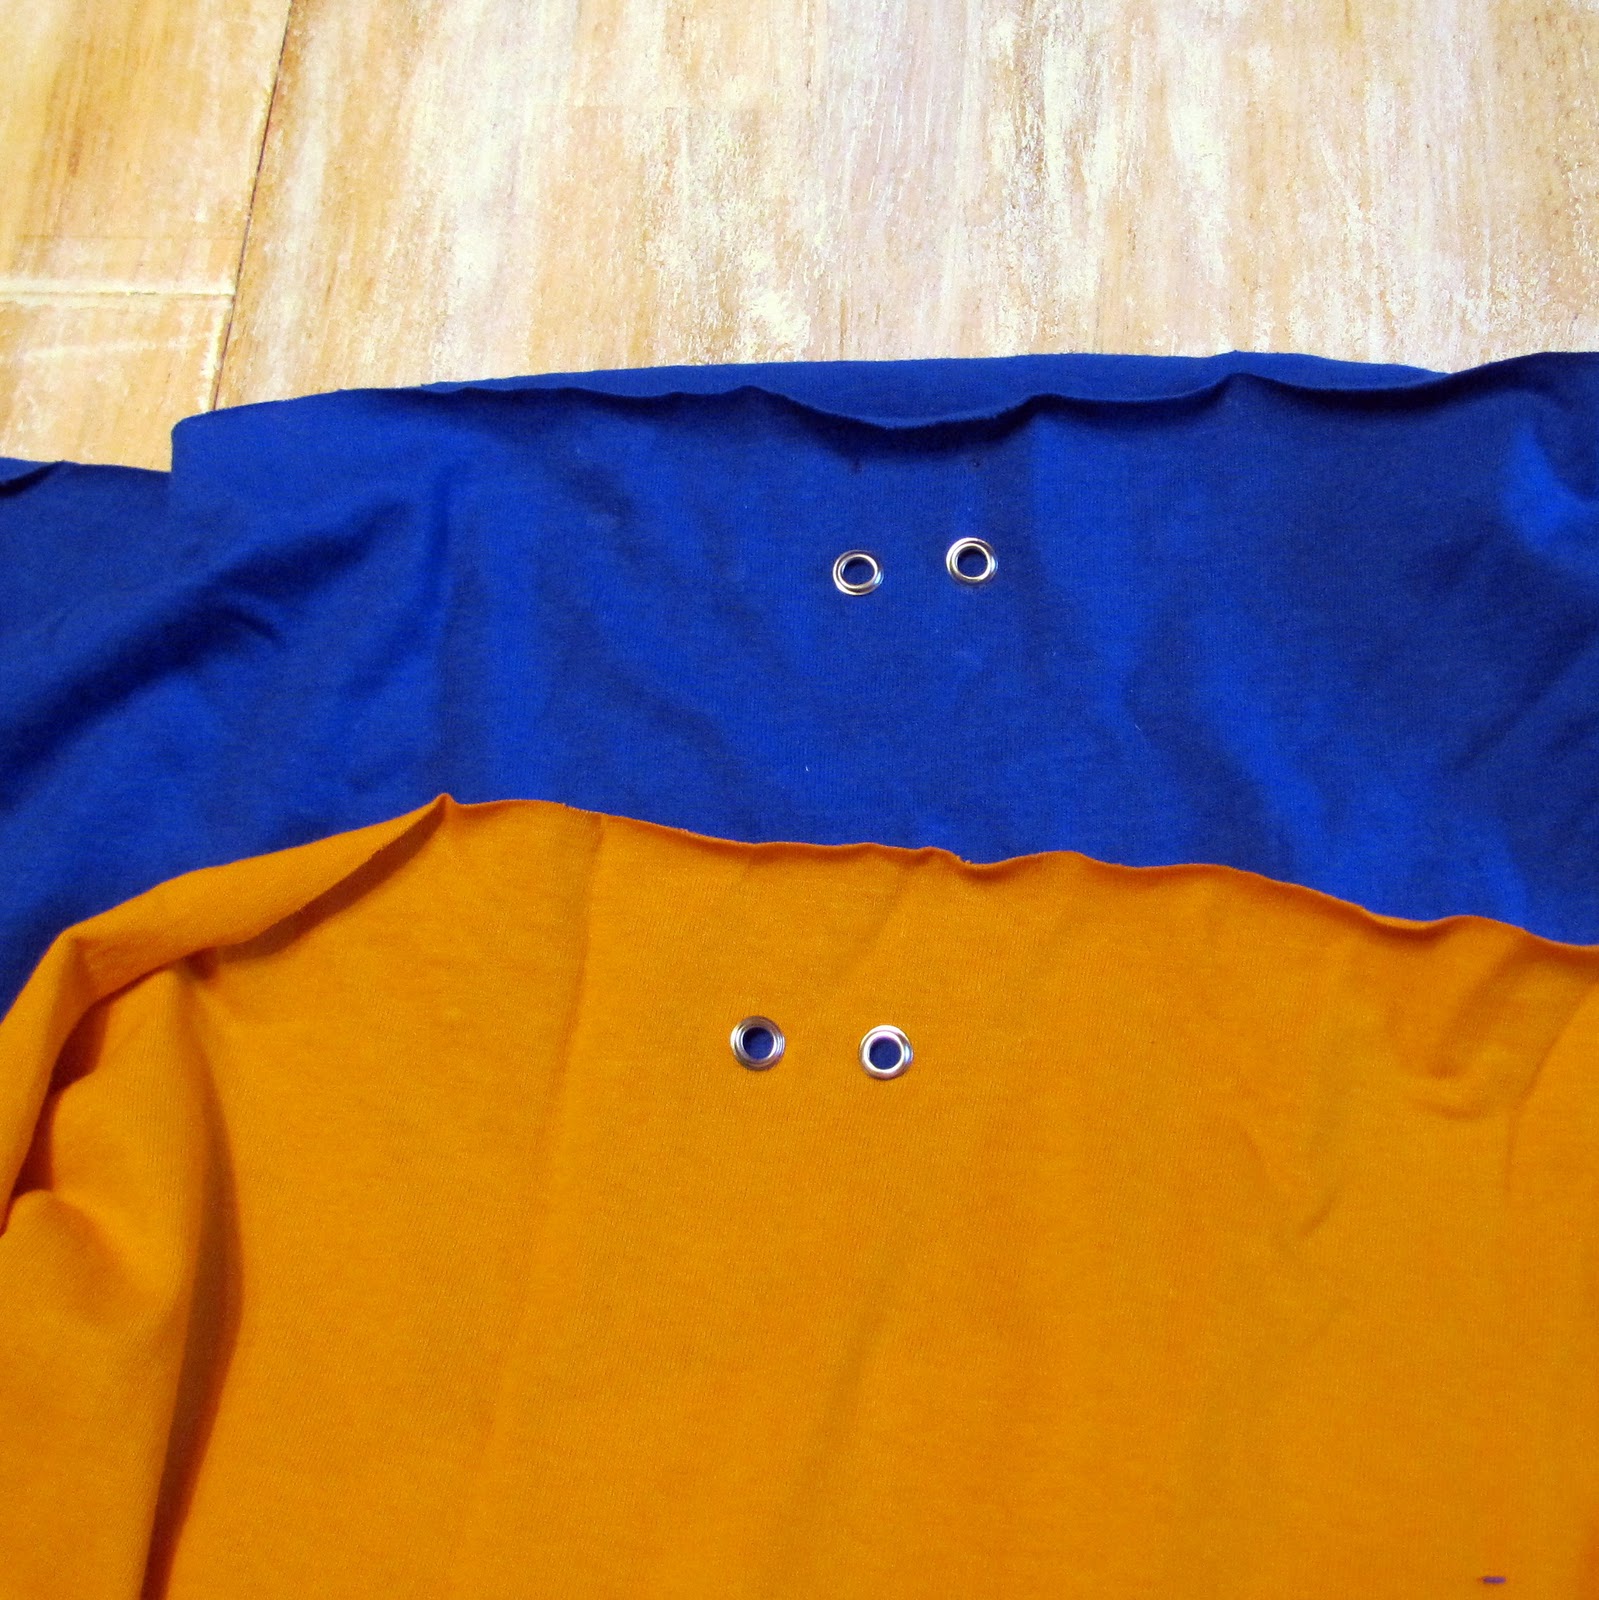
2. The unfinished side (the side where you just cut), is the top. Turn the t-shirt inside out, then fold over 1¼ inches. Decide where you want your first grommet to be and pin. Put a second pin about an inch from the first, making sure the pins are going through only 2 layers of fabric.
3. Flip the shirt right-side out. Measure down ½” from the top where your pins are, and make a little mark by both pins.
4. Follow the instructions that come with your eye holes, and attach them to your bag.
5. Flip the shirt inside out again, and put one end of your grosgrain ribbon through one of the eye holes. Beginning at that eye hole, fold top over 1¼”, and pin making sure to keep the ribbon at the underside top of your fold. You want to make sure that your pinning begins at one hole, and ends at the other, so you can thread the other end of the ribbon through the second eye hole.
6. Make sure the ends of the ribbon are hanging out of the top, and using the LEFT side of your presser foot, sew a hem all the way around, and be sure to backstitch at both the beginning and the end, and avoid catching the ribbon while sewing.
7. Find a font you like, then just type whatever letters you need, and print them out. For the “T”, I used Harry P font that I downloaded from dafont.com. It is Bold faced, outline (in Format, then Font), and 350pt. The “L” is the Transformers font, also from dafont, outlined, and 350pt. Then, trace the letters onto freezer paper.
8. Flip the bag again so the right side is out. Your bottom hem will be where the bottom hem on the t-shirt is. So, using that as a guide, decide where you want your image/letter to be placed. With the SHINEY SIDE DOWN (against the fabric), iron the freezer paper onto your bag.
9. Place pins as a guideline around where your image is, and turn inside out (I know, there’s a lot of flipping and turning!).
10. Cut off a chunk (I used a sleeve) from the other t-shirt, and pin to the wrong side of your bag, in the middle of your pin guidelines. Pin through both layers of fabric, and the freezer paper. Then, you guessed it, turn it right side out again.
11. Using your image as a guide, straight stitch all the way around.
12. Carefully pull the freezer paper off. If you rip too hard, you may also rip the stitching out - trust me! Now, for the hard part…
13. Verrrry carefully, cut just the top layer away about 1/8" - 1/4" from the inside of your stitching.
14. Using ½ - 1 strand of embroidery floss, hand stitch around the letter, making knots every few stitches.
15. With the shirt inside out, and using the bottom hem as a guide, sew a seam 1/4" from the shirt's hem.
16. Turn the bag rightside out, pull the top so it is completely flat, and tie a knot in the ribbon.
And, Voila! You are done!