Now, onto the tutorial!
So, I came across this technique a couple of years ago, and I love it. I used to avoid bias tape altogether, if I could get away with it. The stuff I could find at the stores was too boring for some projects, and I hated making my own. I'd measure, pin, sew, rip out, and redo several times before I got it just right.
This not only solves that problem, but it gives me several yards of bias tape from just one fat quarter of any fabric I like! Another bonus is that it's a lot cheaper. I can spend about $4 on two packages (usually about 3 yards/pkg) of poly/cotton bias tape, or I can spend $1-$2.50 and get 5 yards from a single fat quarter. There’s also no reason why you couldn’t use the same method with a larger piece of fabric.
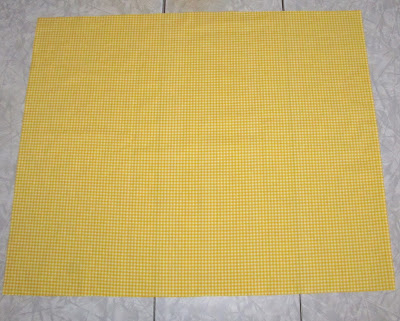
Lay your fat quarter flat on your work surface with the 22” side facing you.

Bring one of the top corners down to create a diagonal fold. Press along the fold to create a crease. You can use an iron for a rigid crease, but your finger will work just fine, too!

Unfold and cut along the crease. I prefer to use my rotary cutter, but scissors work well, too. Try to keep the cut as straight as possible.

Move cut piece over so that the 18” vertical sides are next to each other.

Pin the two pieces, right sides together, along the 18” vertical sides. Sew together, using a 1/4” seam. You’ll be cutting across this seam, so use a small stitch.

Press open.

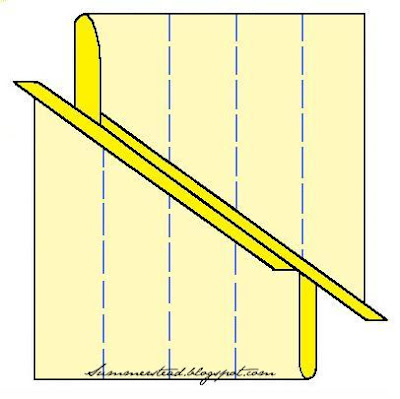
Using a straight edge, draw lines 1/2” to 2” apart, depending on how you want your bias tape. (See end of post for more information) If the end is too narrow, you’ll need to cut it off so all your lines are equally spaced.
Fold your fabric, right sides together, and pin together to create a tube, making sure your lines will meet up along the seam. The beginning and end will not meet up with an opposite side.

If you place your pins 1/4” down from edge, making sure the lines line up on the pins, you shouldn't have any problems.

Using a 1/4” seam allowance with short stitches, sew together, then press open.

Cut along the lines, and you end up with a strip of fabric about 5 yards long!
Almost done!
*Pressing*
Instructions for 2” strips:
1. Fold in half, wrong sides together, and press.
2. Open the fold, and fold one edge till it almost meets the middle crease, and press. Repeat with other edge. Stop at this step for Single Fold tape, continue to step 3 for Double Fold tape.
3. Fold again along the fold you made in step 1, and press.
*Strip Width - Tape Width*
Single Fold
1/2” Strip = 1/4” Tape
1” Strip = 1/2” Tape
2” Strip = 1” Tape
Double Fold
1” Strip = 1/4” Tape
2” Strip = 1/2” Tape
Now you're ready to add some cute bias tape to finish off your projects!


0 comments:
Post a Comment
Thanks for stopping by!